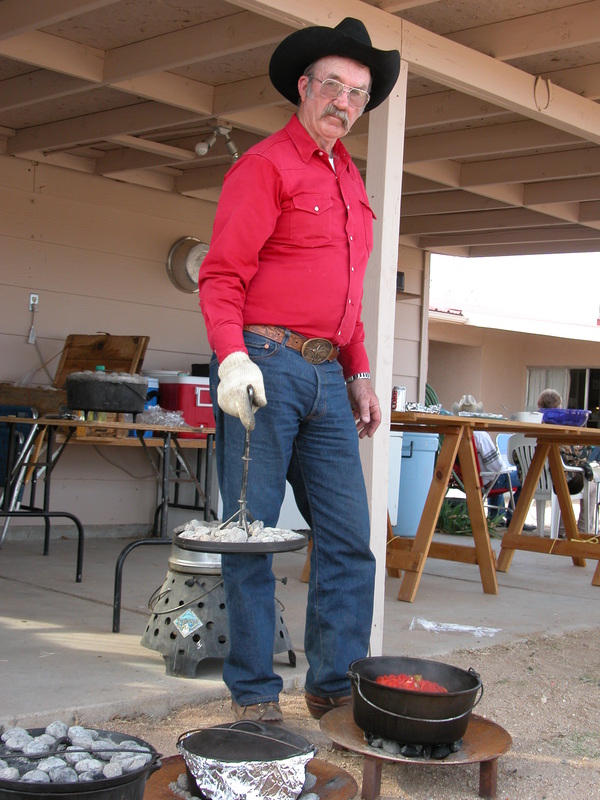
Dutch Oven Cooking with Floyd Crandall
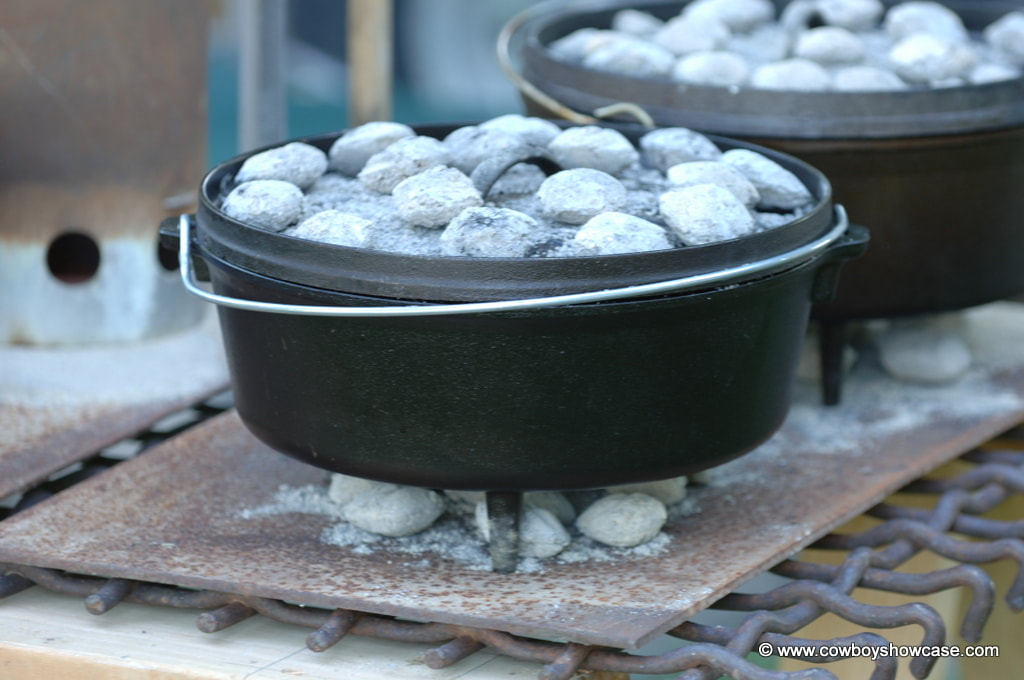
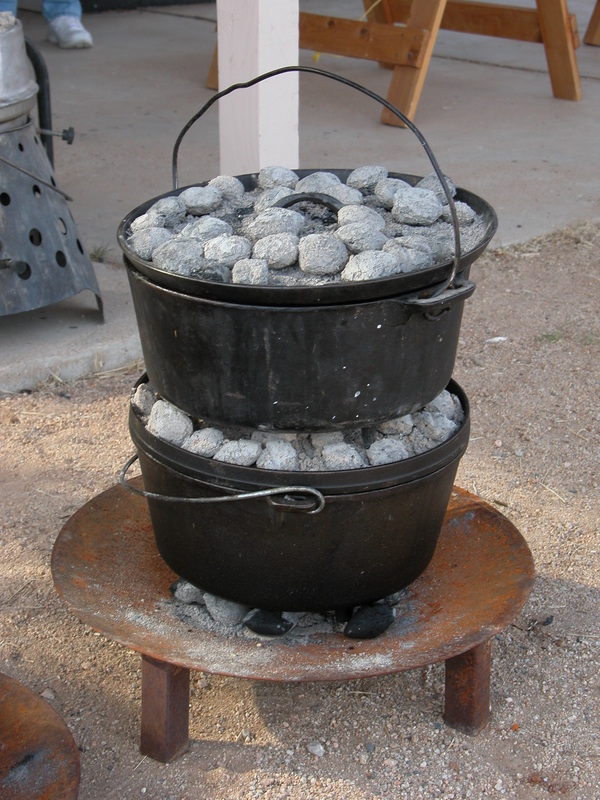
Floyd Crandall is a rancher, mule man, and Dutch oven cook from Fairfield, Idaho who has perfected the art of Dutch oven cooking. Floyd believes, “You do not need to be a teamster and wagon cook to become a successful Dutch oven cook. With today’s new mixes, packaged food that are easy to fix, a very basic set of ovens, and a few accessories, anyone can cook with Dutch ovens.” He has shared with us some of his simple methods that can be used in your backcountry camp or on your patio at home. Techniques, Tips, and Recipes by Floyd Crandall How to control the heat. I think the first thing a person should learn about Dutch oven cooking is how to control the heat. Most of the cooking is done on the top of oven. As a general rule, you should have twice as much heat on the top of the oven as you do on the bottom. That is easy if you are using charcoal. You can simply count them. If you are using coals from a fire, it depends on what kind of wood you are using and hard woods seem to work the best. You just have try some and see what works the best. Any wood will work ,but you will find that some is surely better. I use only Kingsford charcoal because it is always the same. When I cook in the mountains of Idaho I use either aspen or fir. In the southwest cedar or mesquite seem to work well. 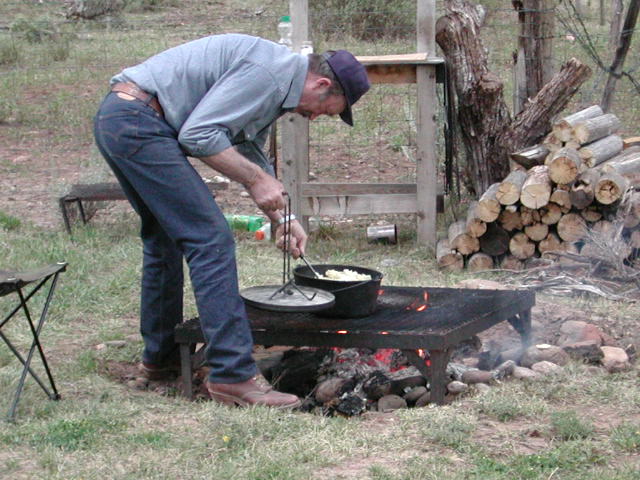
What Shall We Cook?
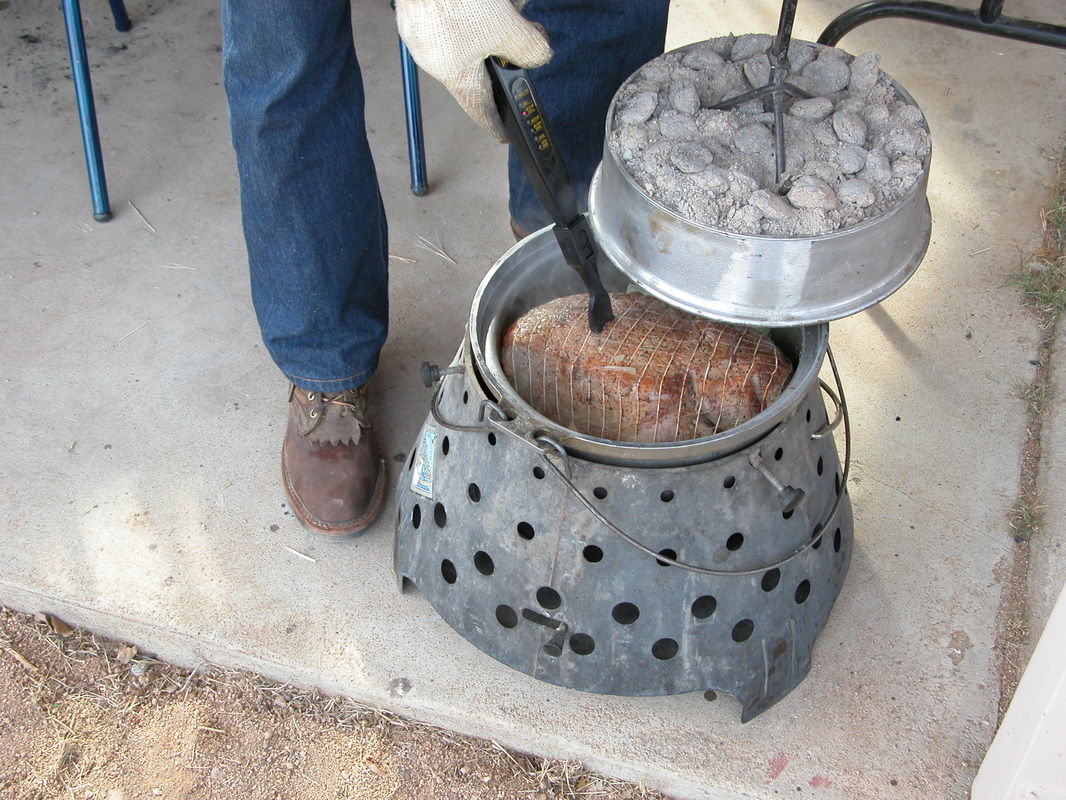
Now that we know how to control the heat, let's cook a real meal that will satisfy almost everyone . Cooking Meat I like to use the best cuts of meat, such as a sirloin roast, because there is no waste and, in case there is any left over, it can be used later in many ways. One half package of dry onion soup mix rubbed on the meat before it is cooked will be all the seasoning that is needed. For a big roast -10 lbs or so- use a whole package. Add a cup of water to your Dutch oven and begin to cook your roast with 8 charcoals on the bottom and 12 on the top. Be sure and not let the oven cook dry. Add a little water as needed .This is hotter than you would cook biscuits but it works. After about an hour, you will need to add a few new charcoals and now would be a good time to add a couple stalks of celery, two big onions and fill the rest of the oven with carrots and potatoes in what ever proportions you like. If you get the oven too full put a piece of foil over the top .Remember, if you cook the potatoes too long they will be mushy. Continue to cook about one more hour or until the potatoes are done. You will have gained lots of juice by now and that can be thickened with a little flour or corn starch to make gravy. If you are in a place where you can do it, the very best way to cook meat is to bury it in the ground . To do this, you prepare your meat and vegetables the same way and dig a hole 2 feet deep and 2 feet across. Fill the hole with wood cut into small pieces and add the same amount of wood above ground and then burn the wood until it is reduced to red hot coals. Separate the coals and after putting a piece of foil over the oven to help keep the dirt off, place the oven down in the coals making sure to get some on all sides, underneath, and lots on top. Cover the oven with the handle straight up and add enough moist dirt to completely cover the fire. If you can see any smoke, add more dirt. It will take about 6 hours for this to cook. The good thing about cooking this way is you can dig this up in 6 or 8 hours and it will be done to satisfy your hungry party, without being over cooked. 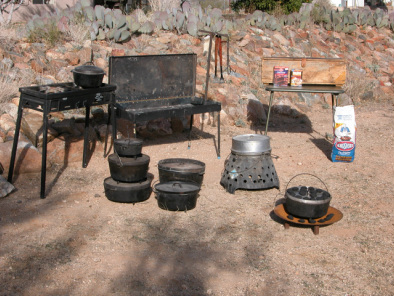
A turkey also works well to either cook with charcoal or bury in the ground .I just season the turkey with a little season-all type salt and cook with 12 coals on top and 8 underneath. A 12 pound bird cooks in about 2 hours. Buried in the ground, it really doesn't matter what it weighs, a turkey will be done in 4 or 5 hours. Easy Bean Dish: To complement almost any meat dish, I like to use a very easy bean dish .Take 2 cans of pork and beans, 1 can of kidney beans, 1 can of garbanzo beans, 1 can of lima beans or what ever other beans you like, and mix them together after draining the juice off all but the pork and beans. To this, add a mixture of 3/4 cup of ketchup, 1 Tbsp. of mustard, 1/2 cup brown sugar ,1 Tbsp. molasses and 1 Tbsp. vinegar. Brown 1/2 chopped onion and little bacon and add to the mixture. Heat this up slowly as you cook your meat.
Now let's make some biscuits. I simply take some Bisquick and mix it up with enough water to make a dough that I can spoon out in biscuit size amounts. (This will take a little practice.) I usually put 16 or so biscuits in a 12 inch oven. This size oven is good for biscuits. Each biscuit must be rolled in oil (that's what makes them brown), so add enough oil to your oven to very lightly coat each one as you add them to the oven. Don't worry about their being round. It won't matter. Just crowd them to use up your dough. Now we are ready to add heat. I'm usually in a hurry, so I start with 8 charcoals on the bottom and 12 or so on top. When the biscuits have raised and begin to look like biscuits, reduce the heat on the bottom by two charcoals and cook until the sides begin to pull away from the side of the oven. You will see, as they pull away, that they are also beginning to brown around the edges. When this happens, remove the bottom heat and continue to cook on top until they are as brown and crusty on top as you like them to be . The biscuits will take about 30 minutes. They are very easy to do; always a big hit at your cookout. Dump Cake: Now to go along with your biscuits, roast beef, vegetables and beans, I like to make some kind of cake. There are many kinds you can use , Some of my favorites are:
How to season cast iron.
Cast-iron cooking utensils, especially new ones, can stick and give a metallic flavor to foods prepared in them if they are not properly seasoned. Floyd calls this seasoning process "sweetening." Here is an unusual but very successful seasoning method used by the late Harold Nelson, ranch cook Estes Park, Colorado: Fill the skillet or Dutch oven with water and boil a generous handful or more of dry hay. The hay can be alfalfa or grass mix. Boil the hay at a rolling boil for about 20-30 minutes. Then you can rinse the utensil, dry it by heating it on the stove, and rub it with cooking oil or spray it with a cooking oil spray (like Pam) and wipe off the excess. You can also use the water from the boiled hay to sweeten wooden or tin dishes. Soak the dishes for at least 20 minutes. If you don't have hay available, tea leaves will substitute. I just bought a little Japanese-style cast iron teapot and the instructions said that in the unlikely event of rust, the rust is non-toxic, but if it bothers a person, clean the rusted area with a brush and fill the pot with used tea leaves and boiling water - allow to sit 20 minutes, discard and rinse. It goes on to say the tannic acid in the tea reacts with the rust and forms a natural seal. The tea and hay must react in similar ways. So, if you don't have hay available, tea leaves will substitute. Most folks say to avoid soap in cleaning seasoned cast-iron cookware, but a little light soap and water will generally not hurt. After cleaning, heat the cast iron on the stove till hot, spray with a bit of Pam cooking spray and wipe off the excess and it will be fine. 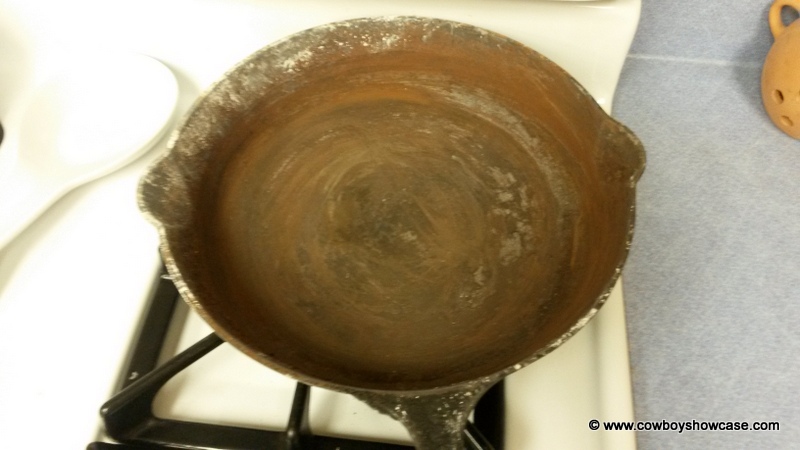  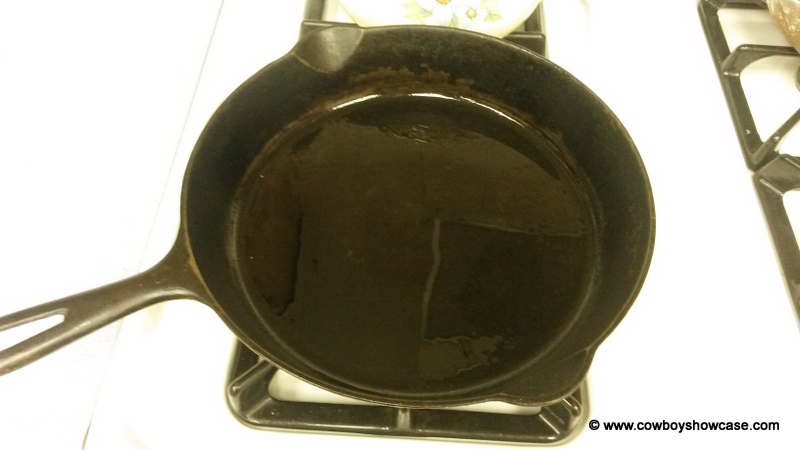 How to restore a badly dirtied or very rusty Dutch oven or other cast iron.
If you find a Dutch oven or other cast-iron cookware that has been left very dirty for a long time and will not boil clean, or if you have a Dutch oven that is heavily rusted or blackened you can place it in a wood stove, fireplace, or camp fire until the outer layers of bad material are burned away. The fire is similar to the heat used in cooking and will not melt the metal, but will burn up charred deposits and oxidation. Then season as above. We have used this method on cast iron vessels that we thought were unsalvageable with outstanding results. |
|
- Home
-
Gear
-
Arts
-
Horses
- Diamond Z English Shire Horses
- 5 Tips for Traveling
- Harnessing A Team
- The Dameles and the Curly Horse
- Rounding Up Wild Horses
- Extreme Horse Camping
- First Pull on the Latigo
- Twister Heller Starts a Colt
- Cowboy Martingale
- Cowboy Training Halter
- Cowboy & Colt Clinic
- Using the McCarty
- Teach a Horse to Stand
- Cowboy Draw Reins
- War Knots >
- Tail Knot for Pack Horses
- Cavvy Marks
- Deworming Your Horse
- Safe Fall Trail Riding
- Horse Remedies
- Hormone Implant
- How to buy a mule
- Brands
- Chuckwagon
-
Articles
- Grubbing Hoe Ranch
- Trevor and Emily Fuhriman
- Land of Extremes
- Jersey Valley Cattle Co
- Diamond Tail Ranch
- Gang Ranch of British Columbia
- TS Ranch of Nevada
- When the TS Ran a Wagon
- IL Ranch
- Basque Ranching
- Crystal Rose Cow Dog College
- Wyoming Honor Farm Inmate/Wild-Horse Program
- Cowboy Etiquette
- Arizona Trigger
- Longhorn Cattle
-
Stories
- For the Love of a Horse
- Breakheart Station Master
- Freighters Outbound
- DK Cowboy Stories: A Prophet With Antlers
- Ben's Trail
- Spendin’ Time at Cow Camps
- Slewfoot The Black Bear
- Orphan Boy
- Mooney's Stories - The Circle A Ranch of Nevada >
- Wild Horse Casey >
- Hero Cattle Dogs
- Ranching Traditions
- Life Lessons
- Dave’s Summer Adventure
- Fire-Proofing the Range
- Cowboy Superstitions
- Cowboy Humor
- Portrait of a Cowboy >
- Tons of Silver
- History
- Cowboy Profiles
- Glossary
- Cowboys of the World


|
|
Search Cowboy Showcase
|
Cowboy Showcase e-mail
Web site design by Lee Raine
Photos by Lee Raine unless otherwise noted.
Copyright © 2000-2024 by Lee Raine. All rights reserved.
External links are listed as a convenience. We take no responsibility and give no guarantees or warranties, implied or otherwise, for content or accuracy of third-party sites. External sites are not necessarily endorsed by Cowboy Showcase.